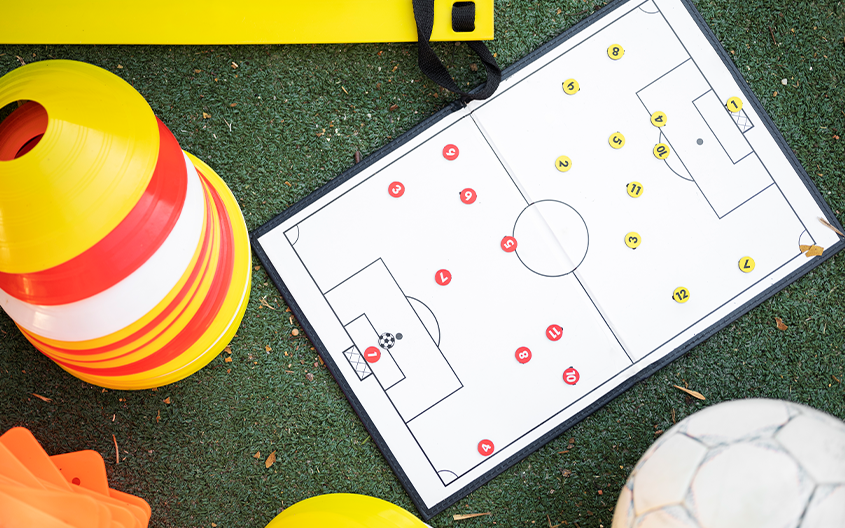
In the “Silver Studs Way,” we do not just play football; we engineer outcomes. To an elite player, the pitch is not a chaotic patch of grass – it is a sophisticated grid. By breaking the field into Thirds, Channels, and Zones, we create a tactical map. This map allows us to communicate instantly, move in synchronisation, and dismantle any opponent with surgical precision.
This guide is designed to take you from a player who “follows the ball” to a player who “controls the space.”
The Horizontal Perspective – The Three Thirds
The pitch is divided horizontally into three equal sections. Your location on this horizontal axis determines your Risk Profile and your Technical Priority.

1. The Defensive Third (The Build-Up Phase)
This is the area from our goal line to approximately 35 yards out.
- The Objective: Clean, vertical progression.
- The Mindset: In this third, we are “composed engineers.” A mistake here is high-risk. We prioritise ball retention and finding the “spare man” to bypass the opponent’s first line of pressure.
- Unit Roles:
- Goalkeepers: Act as the “11th outfield player,” providing an angle for back-passes to reset play.
- Defenders: Must create “width and depth.” Centre-backs split wide to force the opposition’s strikers to run further, opening passing lanes through the middle.
- The 1% Gain: Scanning before receiving the ball in the defensive third allows you to know if you can “turn” or if you must “play the way you face.”
2. The Middle Third (The Construction Phase)
The transition area between the two penalty boxes.
- The Objective: Dictation and probing.
- The Mindset: Patience. This is where we “move the opponent.” We don’t force the pass; we pass to move the defenders out of their structure.
- Unit Roles:
- Midfielders: They are the “conductors.” Their job is to maintain the “rhythm” of the game. If the middle is congested, they “recycle” the ball to the other side.
- Full-backs: In the Silver Studs system, full-backs in this third act as “auxiliary midfielders,” providing options in the wide channels to stretch the play.
- The 1% Gain: Body orientation. Always receive the ball with an “open” body shape so you can see both the man who passed it and the goal you are attacking.
3. The Attacking Third (The Creation Phase)
The final 35 yards leading to the opponent’s goal.
- The Objective: Impact and conversion.
- The Mindset: Ruthlessness. This is the only part of the pitch where losing the ball is acceptable, provided it happened because you tried to create a scoring chance.
- Unit Roles:
- Attackers: Must be explosive. Their movements (runs in behind or coming short) are designed to “unbalance” the defensive line.
- Midfielders: Looking for “killer passes” or late runs into the box.
- The 1% Gain: “First-time thinking.” In the attacking third, space closes rapidly. You must know your next move before the ball arrives.
The Vertical Perspective – The Five Channels
While thirds tell us our distance from the goal, Channels tell us our distance from the touchline. Modern elite football is won in the vertical corridors.

1. The Wide Channels (Left & Right)
These are the strips of land hugging the touchlines.
- The Tactical Use: Stretching the Block. By keeping players (Wingers or Full-backs) in the wide channels, we force the opponent’s defensive line to spread out. This creates gaps in the middle.
- Key Skill: 1v1 dominance and high-quality delivery (crosses and cut-backs).
2. The Central Channel (The Spine)
The most dangerous and most protected part of the field.
- The Tactical Use: Direct Threat. This is the shortest path to the goal. However, because it is so dangerous, it is usually the most “congested” (crowded) area.
- Key Skill: Quick “one-touch” play and the ability to play with a defender “on your back.”
3. The Half-Spaces (The “Indecision Zones”)
This is the most critical concept for a Silver Studs player. The half-spaces sit between the Wide Channel and the Central Channel.
Why they are “Indecision Zones”: If an attacking midfielder stands in the half-space, the opponent’s Full-back doesn’t know whether to stay wide or move inside to mark them. If the Full-back moves in, our Winger becomes free. If the Full-back stays wide, our Midfielder is free to drive at the goal.
Historical Note: Teams like Manchester City use these zones to “overload” defences, creating 2v1 situations that are impossible to defend.
The 15-Zone Grid – A Detailed Tactical Breakdown
By overlaying the 3 Thirds with the 5 Channels, we create the 15-Zone Grid. In elite coaching, we use these numbers to give specific instructions.

The Build-Up Grid (Zones 1-5)
- Zone 3 (The Heart of Defence):
- The Scenario: The Goalkeeper has the ball.
- Tactical Requirement: Never lose the ball here. Centre-backs occupy the edges of Zone 3 to receive and move the ball into Zones 2 or 4.
- Zones 2 & 4 (The Defensive Half-Spaces):
- The Scenario: A “Holding Midfielder” (No. 6) drops into these zones.
- Tactical Requirement: This is where the “first pass of the attack” happens. From here, you look to bypass the opponent’s first line of pressure.
- Zones 1 & 5 (The Defensive Flanks):
- The Scenario: The Full-back receives the ball under pressure.
- Tactical Requirement: Use the touchline as protection. If trapped, play a “diagonal” pass back into Zone 3 or forward into Zone 7/9.
The Construction Grid (Zones 6-10)
- Zone 8 (The Engine Room/Centre Circle):
- The Scenario: The ball is being recycled.
- Tactical Requirement: If you are in Zone 8, you are the “pivot.” You must scan 360 degrees. Your job is to move the ball from a “crowded side” to an “open side.”
- Zones 7 & 9 (The Creative Half-Spaces):
- The Scenario: An attacking midfielder (No. 8 or No. 10) finds space here.
- Tactical Requirement: This is where “playmaking” happens. From Zones 7 or 9, you have the best angle to play a through-ball into the “Gold Mines” (Zones 12/14).
- Zones 6 & 10 (The Midfield Flanks):
- The Scenario: A winger stays wide to receive a “switch” of play.
- Tactical Requirement: Hold the width. Force the opponent’s winger to track back 40 yards.
The Creation Grid (Zones 11-15)
- Zone 13 (The “D” and Penalty Box):
- The Scenario: The Striker is waiting for a delivery.
- Tactical Requirement: Do not stand still. Move “out of” the zone to drag a defender away, then “sprint into” the zone as the ball is played.
- Zones 12 & 14 (The “Gold Mines”):
- The Scenario: An Inverted Winger cuts inside.
- Tactical Requirement: These are the most valuable zones in football. If you receive the ball here facing the goal, your priority is to Shoot or Slide a pass to the striker.
- Zones 11 & 15 (The High Flanks):
- The Scenario: A Full-back overlaps a Winger.
- Tactical Requirement: Deliver a “low-driven” cross or a “cut-back” to the edge of the box. High, looping crosses are easier for goalkeepers to catch; cut-backs are harder for defenders to clear.
Unit Relationships – How We Move Together
Understanding the zones is useless if we move as individuals. We must move as “units.”
The Defensive Unit (Zones 1-5)
- The “Slide”: If the ball is in Zone 1 (Far Left), the entire back four must “slide” towards that side. The Right Back (who would be in Zone 5) moves into Zone 4 to keep the team “compact.” We “leave the furthest zone” (Zone 5) because it is the least dangerous area at that moment.
- The “Step”: When the ball moves from Zone 3 to Zone 8, the defensive line must “step up” to the edge of the Middle Third. This keeps the team “connected” and reduces the space for the opponent’s midfielders.
The Midfield Unit (The Bridge)
- Staggered Positioning: Never stand on the same horizontal or vertical line as your teammate. If one midfielder is in Zone 8, the other should be in Zone 7 or 9. This creates Triangles. Triangles are the “DNA” of the Silver Studs Way – they ensure the player with the ball always has at least two passing options.
- Covering: If a midfielder drives forward into Zone 12, a teammate must move from the Construction Phase into a “rest-defence” position in Zone 7/9 to prevent a counter-attack.
The Attacking Unit (The Spearhead)
- The “Opposite Movement”: If the Striker (Zone 13) comes “short” to receive the ball, a Winger (Zone 11 or 15) must make a “diagonal run” into the space the striker just left. This “pins” the defenders and creates chaos.
Phase Transitions – The “Engineering” of Speed
The most critical moments in football happen when the ball changes hands.
Transition: Defence to Attack (The Counter)
When we win the ball in Zone 3, we have 3 seconds to decide:
- Exploit: Is there space in Zone 13? If yes, play a “vertical” ball immediately.
- Consolidate: Is the opponent “compact”? If yes, move the ball into the “Construction Phase” (Zones 6-10) to reset our shape.
Transition: Attack to Defence (The Counter-Press)
If we lose the ball in Zone 12, the nearest three players must “suffocate” the opponent within 5 seconds. We don’t run back to our goal; we “hunt” the ball in the zone where we lost it. This is how elite teams maintain 60–70% possession.
Training the “Inner Architect”
How do you apply this in your next training?
- Scanning (The Radar): Every 3 seconds, turn your head. You aren’t looking for the ball; you are looking for which Zone you are in and which Zone is empty.
- Communication: Start using zone numbers. Instead of shouting “Man on!”, shout “Check your Half-Space!” or “Switch to 10!”.
- Visualisation: Before you go to sleep, imagine yourself in Zone 14. See the defender coming at you. Imagine the “Gold Mine” pass to your striker.
You Might Also Like
Nothing Found